¶ SOFTS TURRETS USER GUIDE TRAINING
¶ Presentation of the turrets
¶ Models offered
OPEN LAKE TECHNOLOQQGY offers 2 models:
|
 |
|
 |
IMPORTANT: There is no functional difference between the "soft" and "hard" turrets. In fact, the "soft" turret integrates the "standard" functions including :
- Secure access
- Management of 5 channels included (Combined D/L + Micro + 2VD)
- The possibility of standby (2 or 3 VD in the offer)
- A personalised directory
The tablet is only used for professional purposes:
- There is no administrator right (no possibility to install applications)
- No limitation of access to Windows tools or installation that does not require administrator right.
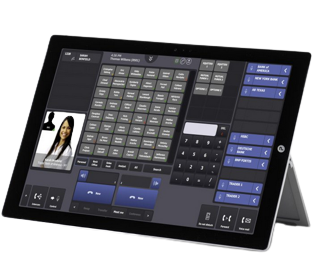
¶ Presentation of the SOFT turret
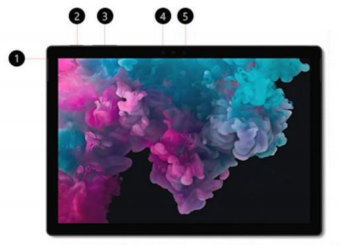
¶ ¶ Presentation of the equipment : Microsoft Surface Pro 7 tablet
|
1 - Jack socket 2 - Start/alarm button 3 - Volume up/down 4 - Windows Hello login (facial recognition) 5 - Camera (see also the manual of the device) |
 |
|
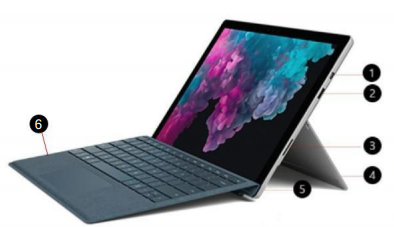
1 – Mini display port 2 – USB 3.0 Port 3 – Power port 4 – Support (not provided) 5 – Micro SD card reader (not provided) 6 – Keyboard (not provided) |
 |
| Microsoft Surface Pro 7 charger |
 |
|
Headphones: Model to be validated 1 - Wireless headset 2 - Base 3 - Power cable 4 - Bluetooth dongle |
 |
|
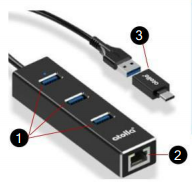
USB/ Ethernet adapter 1 - USB 3.0 port 2 - Ethernet port 3 - USB 3.0 / mini display port adapter |
 |
Advices :
- Headset :
- Connect the Bluetooth dongle to the USB 3.0 port on the tablet.
- Use the base only for charging the headset
- USB/ Ethernet adapter
- Connect the tablet/PC to your Internet box via an Ethernet cable rather than Wi-Fi
- Use the USB 3.0 / mini display port adapter
¶ Connecting to the Tablet
| 1 - Press the start button, then on the screen slide up/down |
 |
| 2 – Press the "First Name Last Name" box, enter your PIN code |
 |
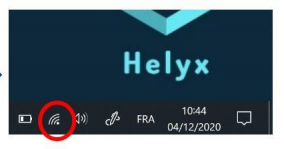
| 3 – Select your WIFI network, then enter your WIFI password |
 |
| 4 – Run the OpenVPN Connect tool (double clicks) then launch the VPN connection |
 |
| 5 - Check that the VPN connection is in the "Connected" state |
 |
Advices : Wait 1 min ~1m30 after VPN connection
| 1 – Double click to access the T4-Flex tool (Soft turret) |
 |
| 2 – Click to access the password entry (check that it is your login, otherwise click on "other user". |
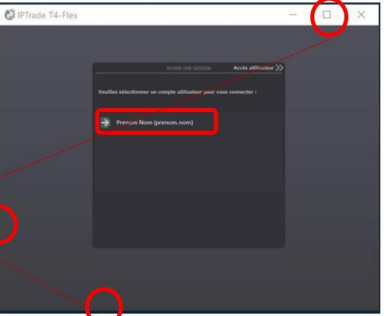 |
| 3 - Enter your password, when the entry is correct |
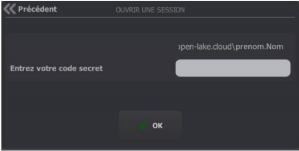 |
| 4 - The tool connects to the solution |
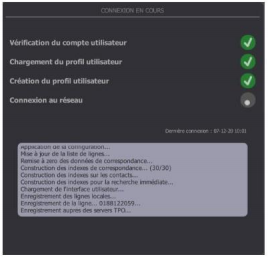 |
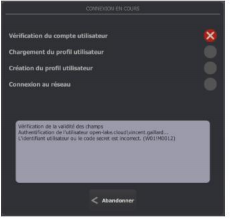
¶ Possible error message from the T4-Flex tool
These messages may occur in case of loss of Internet access, or loss of VPN access. Make sure your Internet / VPN access is restored
| This message indicates that the tool is running: click on "OK", then wait a few seconds before running the tool again |
 |
| This message indicates that the tool is running: click on "Cancel", then wait a few seconds before running the tool again. |
 |
¶ Incorrect login/password
| If there is a problem with the login and/or password, click on "Abort" to start again |
 |
¶ Features and uses of the turrets
¶ Global interface
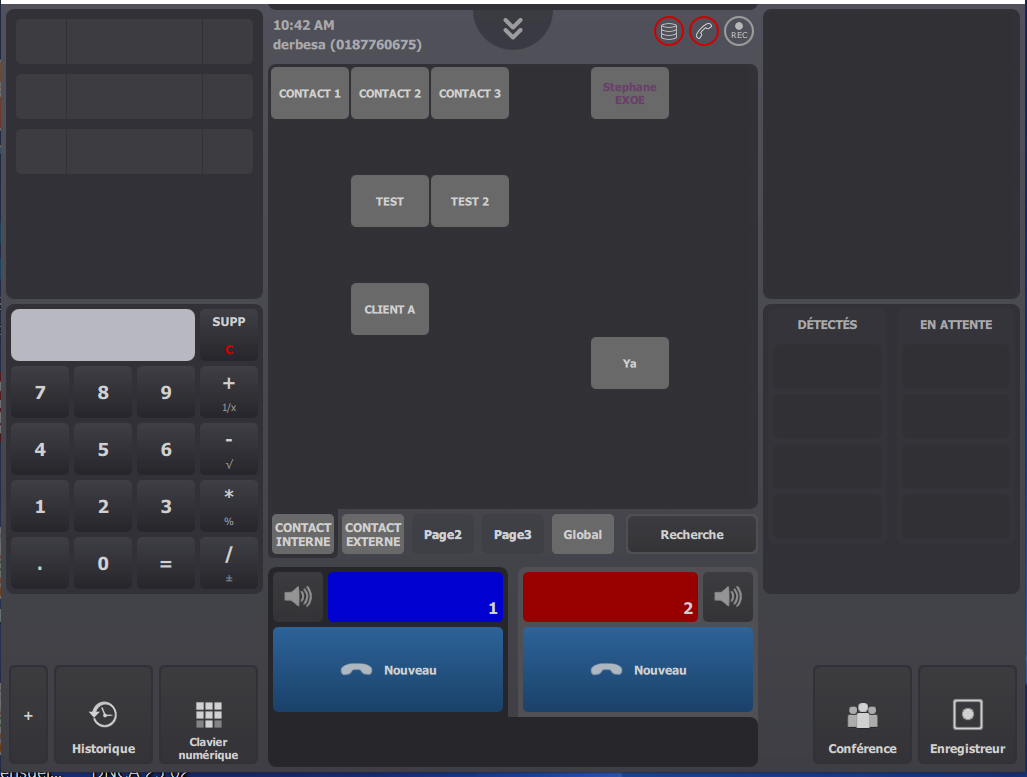
| 1 – Information / Statut |
 |
| 2 – Control button |
 |
| 3 - Solution status |
 |
| 3.1 - All services are OK (TSS, IPBX, recorder) |
 |
| 3.2 - One or more services are KO or partially KO |
 |
|
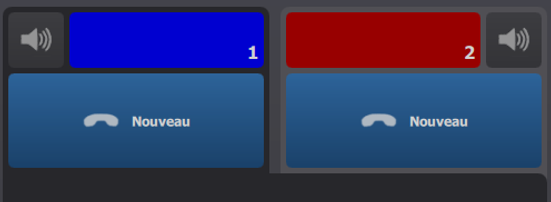
4 – Speaker Monitor Applet (Standby/boxed call controls) IMPORTANT : 3 maximum calls in the box |
 |
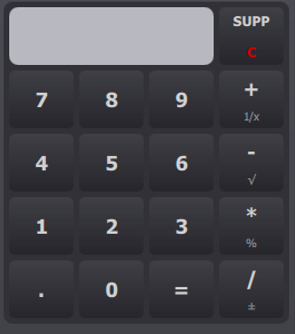
| 5 - "Keypad" applet |
 |
| 6 - Access to other features |
 |
| 7 - Line/Page Management |
 |
|
8 - Headset/handset controls. IMPORTANT :
|
 |
|
9 – Floating Applet (Calls made by all users in the same group sharing lines). IMPORTANT : Flashes between the Name/Number of the caller and called :
|
 |
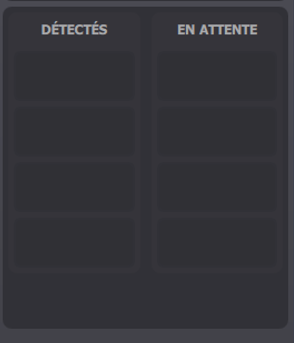
| 10 – Call Status Applet (Calls detected and waiting for the user of this board, note that the background flashes red to notify them) |
 |
| 11 – Satellite buttons (Call control/recording) |
 |
¶ Configuration of the turrets
¶ Preference configuration
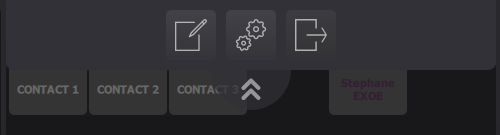
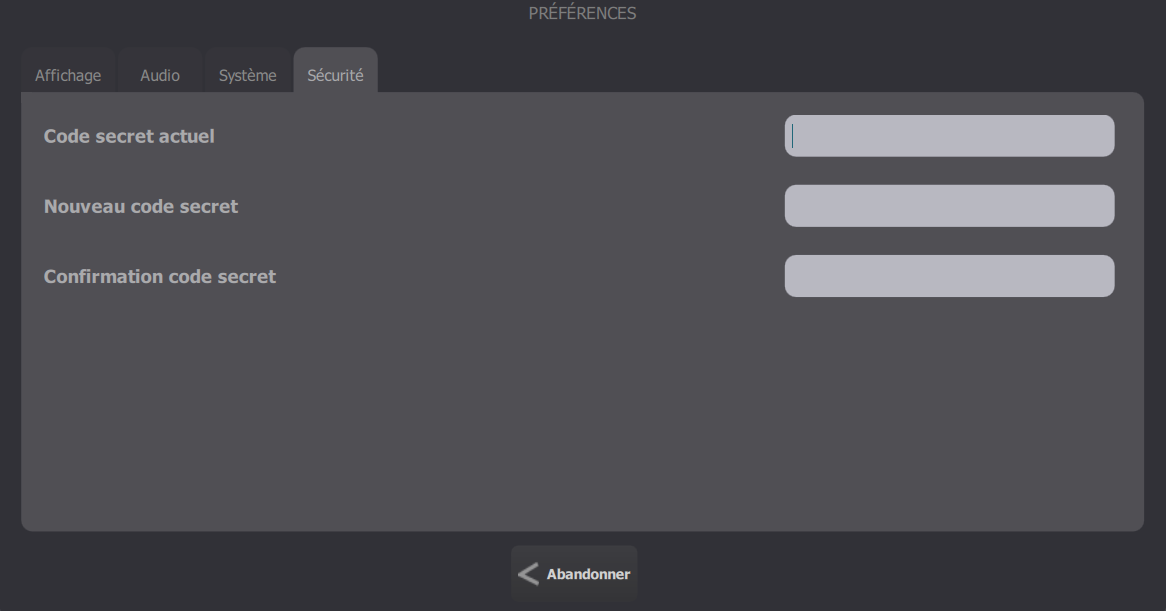
| 1 – Press the control button and then the cogs to access the preference settings |
 |
| Display |
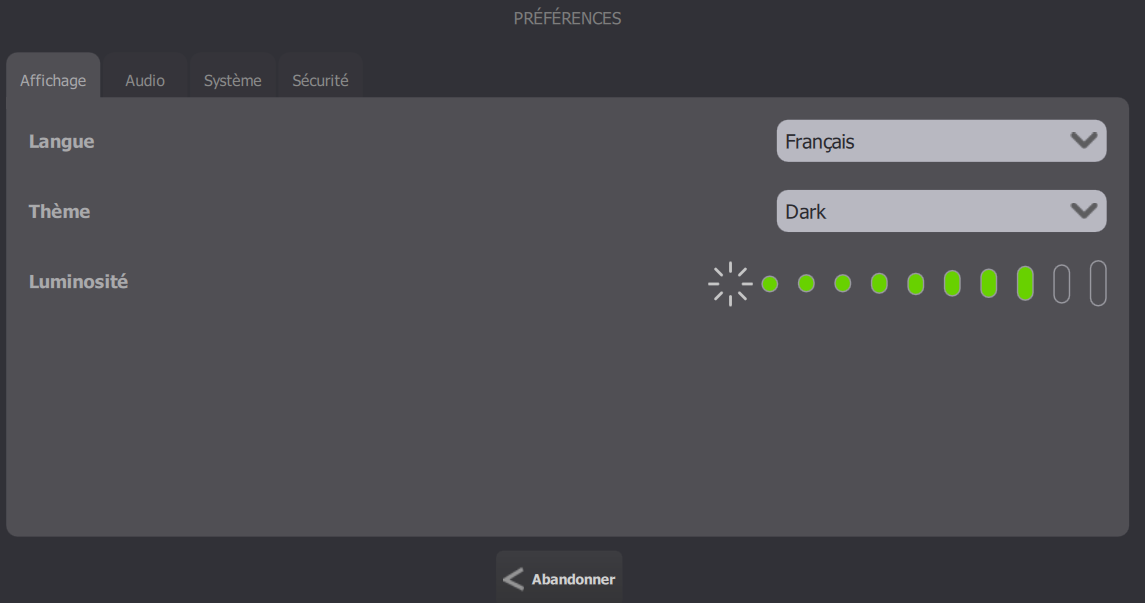 |
| Audio |
 |
| System |
 |
| Security |
 |
|
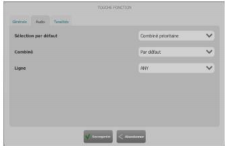
In order to connect the headphones, select yours. Suggestion:
|
 |
¶ Line/Page configuration
|
Enter the "Line/Page Configuration" mode  Note that the background changes to red. Move a contact: click on "Position". Then select a contact and the empty page/box you want. Delete a contact: click on "Remove". Then select a contact. IMPORTANT: The contact is deleted directly - no request for confirmation of deletion |
 |
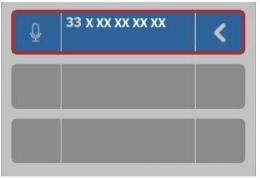
| 1 -Create a new contact: Select an empty box to create a new contact. |
 |
| 2 – Indicate the name of the contact, the type (extension, contact...) and the telephone number. You can define the type of number (e.g. mobile) and customise the colour of the text or background. |
 |
| 3 – (If required) Indicate the priority device for this contact (Handset or priority line and specify which). |
|
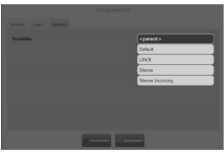
| 4 – (If required) Change the ringing tone for this contact (<parent> if same as others, default...) |
 |
| 5 - Finalise your entry by clicking on "Save" or "Abort". | |
|
Exit the "Line/Page Setup" mode  If the change concerns a shared line, other users in the same group will see the top part flashing red and will have to ACCEPT the update. |
¶ Disconnection of the soft turret
| Remember to disconnect properly from the board before closing the T4-Flex application |
|
¶ Call features
| Handset control area |
 |
| Number pad |
 |
| Speaker Monitor Applet |
 |
|
Call history The call history shows only the last few days |
 |
¶ Main actions
| 1 - Selects the left or right handset (the current handset is highlighted in blue) |
 |
| 2 - Activate (in red) / deactivate the speaker |
 |
| 3 - When activated (in red), other peers cannot join this call or conference |
 |
| 4 - Triggers a call, a fault or a preset device for the headset/handset |
 |
| 5 - Ends an active call on the selected headset/handset |
 |
| 6 - Allows the user to exchange the call between handsets |
 |
| 7 - Allows the user to transfer the current call to another telephone |
 |
| 8 - Merges active calls on the headset or handset(s) into one preferred device |
 |
| 9 - Allows a user to set up a conference |
 |
| 10 - Mutes the handset microphone |
 |
¶ Other actions
| 1 - Places the call on hold (see "Calls Status" applet) |
 |
| 2 - Click to resume the call on hold |
 |
| 3 - Merges conversations on both handsets |
 |
| 4 - Allows you to view the contacts in the conference |
 |
| 5 - Redial the last number dialled, on the default or preselected headset or handset |
 |
| 6 - Re-dials a number from the history |
 |
¶ Others on standby - boxes
|
1 -Allows you to pick up the line (green) to speak or release: -To change the volume of the sound, press + / - -Long press to leave the line open and short press just to speak punctually |
 |
|
2 - Allows you to talk to all selected lines (standby/box) Replay unavailable at station |
 |
¶ Information/Line Management
¶ Line area (Floating Applet)
The lines area contains all the lines of the group with the user line (top). Each line has 3 appearance modes with information about the status of the call (this information is shared). What is visible: Name/Number of the caller and the called party.
| 1 - Incoming call (flashing) |
 |
| 2 - My established calls (fixed) |
 |
| 3 - Line in use (fixed) |
 |
| 4 - Private line (fixed) |
 |
| 5 - My calls on hold (flashes) |
 |
| 6 - Calls on hold on another board (hard/soft) (flashes) |
 |
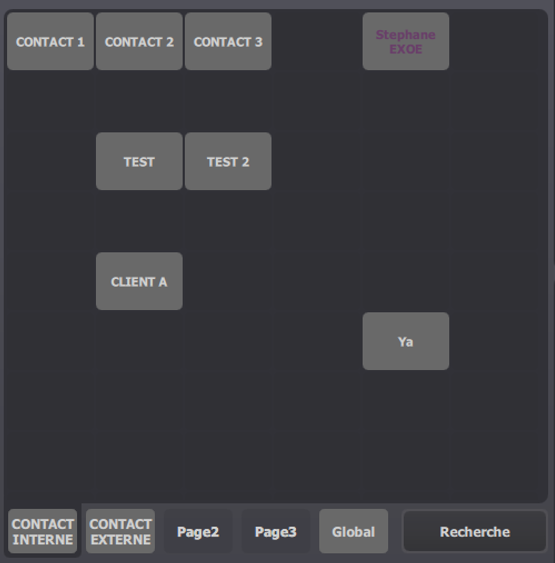
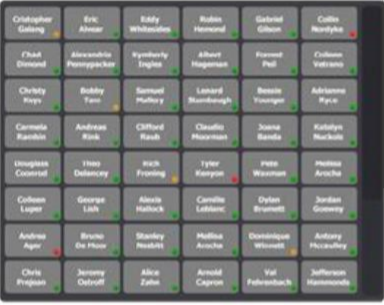
¶ Central panel of favourite pages
|
The central Preferred Pages panel can display pages with 48 shortcut buttons (80 in widescreen mode) at a time. Use the scroll bar to display more contacts on the same page. |
 |
¶ Line area (Floating Applet) Bis

| Personal Page (Home). This is the default page that appears when you log in. |
 |
| Personal Page (Home). This is the default page that appears when you log in. |
 |
|
Access the additional pages containing the contacts or channels in your profile. From this page you can search by selecting a group of pages on the left side of the window, while viewing the button on the selected page. |
 |
|
Access the alphanumeric keypad to make it easier to search for buttons or contacts. It dynamically filters buttons as each character is entered for a quick search. |
 |
¶ Common uses
¶ Making a call
A call can be initiated on your default line or on other lines available to you.
To initiate a call (on your default line):
- Press the "New" button (the button turns orange)
- Enter the desired number
- Press the "Call" button on the telephone keypad (the button turns green once the call is established)
If you press a pre-programmed speed dial/private number button, the call will automatically be placed through your device.
¶ Answering a call
Select the call you wish to answer by pressing the flashing button. The call is answered on your selected device (headset, handset or speakerphone).
¶ Other call functions
¶ a) Making a call (Exclusive/Private): During an active shared call
- Pressing the Exclusive/Private button allows you to take the call privately by removing other users or preventing them from barging in (or joining the call).
- Note: For internal calls, both parties must press the button to take the call in private.
¶ b) Putting a call on hold :
- Press the Hold button
- To place a call on hold, press the button on the line indicating that the call is on hold.
- The call can be removed from hold by pressing the float button on the call or applet status page.
¶ c) End a call :
Press “End”.
¶ d) Transfer (or conference) of a call (consultative transfer) :
When the call is active on the headset or handset :
- Press the 'Transfer (or Conference)' button, this button will automatically put the existing party on hold.
- Call the third party by selecting the contact button (or by pressing "New", dialling the number)
- Press "Call" on the telephone keypad
Note :
- You can press the "Transfer" button again to transfer the call, or wait for the third party to answer in order to view the call. Then press the Transfer button a second time to complete the transfer (for conferencing, simply press Conference once the call is established).
- To abort the transfer and resume the call: press the "Resume" button on the originally selected headset/handset.
¶ e) Transfer to another user :
When the call is active on the headset/handset
- Press the "Hold" button (the call will be put on hold)
If this line is shared with other users in the same group, then the call will be visible and can be intercepted by another user in the vicinity, by selecting it in the "Applet Floating" line area (top right).
¶ f) Sending a call :
When the user presses the "call distribution" key, the active call is distributed to the selected handset. If the selected handset is not handling any calls, then the AX3000 will dispatch the call handled by the other active handset (if there is a call on it).
¶ g) Joining a call in progress :
Creating a conference
- Press the line (with a call in progress) that you wish to join.
- You will then be added to the call (Conference) unless the call you wish to join is in "Exclusive/Private".
¶ h) Cross Talk/Merge :
With a call on both handsets, you can press the "Merge" button to "Conference" them on either selected handset. To view and act on the contacts in "Conference" :

Select a contact to act on the conversation Click on "Exclude" so that the contact cannot hear or speak during the callClick on "Disconnect" to remove the contact from the conference (hang up the call)
¶ Others :
¶ a) Applet Speaker Monitor (Speakers):
Allows a call to be made over a speakerphone, thus freeing the headset/handset device. This allows the AX3000 speaker and microphone to be used for these calls. Calls are initially muted and require the use of the push-to-talk microphone button to speak.
¶ b) Call history applet :
The Business Call History feature of the BT-IP TRADE AX3000 provides the ability to track the activity of calls made, automatically recording several types of actions:
- Calls received
- Calls made
- Missed calls
- Constant visual notification
- Data per session
- Advanced filtering (by line, time, call log type)
- Status notification on individual call keys
- Quick creation of call keys
- Tracking information on each entry
- Add multiple tracking applets on specific filters
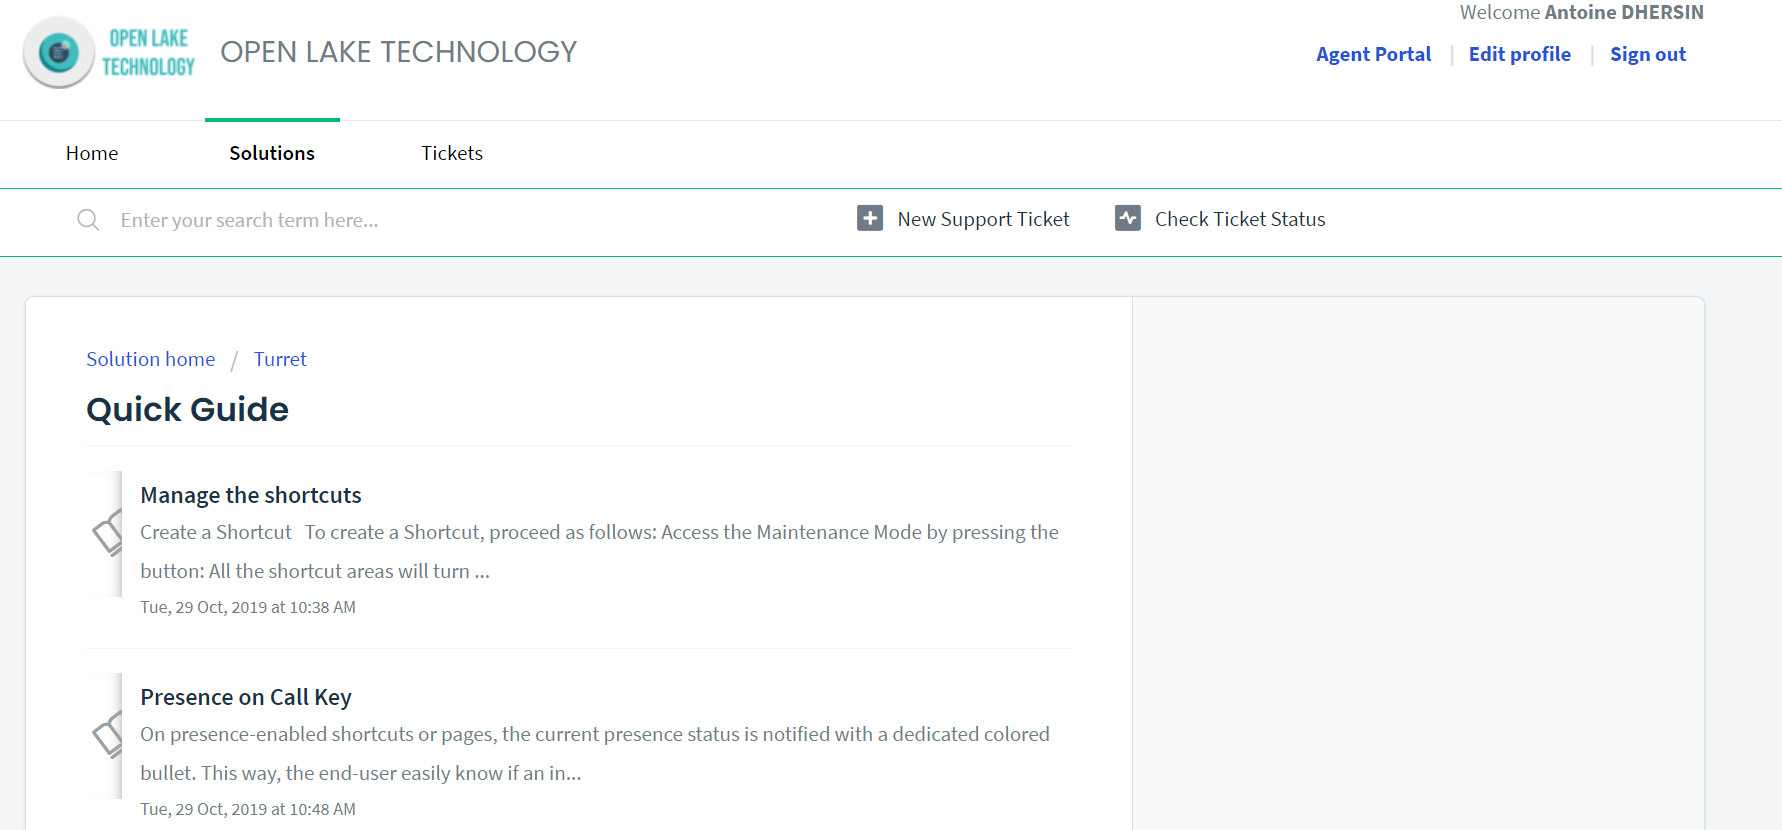
¶ Annexes
For more information on the configuration of the decks:
- See "Manage the shortcuts", "Contact Search", "Call History", ....
- http://support.open-lake.com/support/solutions/folders/47000435553
- See the link to the video of the training course (To be requested)
¶ Using external devices with your T4 Turret
The following information applies when using external devices (other than those supplied by IP TRADE with IP TRADE Turret terminals):
OPEN LAKE TECHNOLOY recommends the use of good quality external devices (speakers, microphones, headphones). These are shielded against unwanted radio frequency (RF) and audio frequency (AF) signals.
Depending on the quality of these devices and their proximity to other devices (such as mobile phones or two-way radios) some audio noise may still occur. In these cases, IP Trade recommends that you take one or more of the following measures:
- Move the external device away from the source of the RF or AF signals (at least 10 inches).
- Route the cables from the external device away from the source of the RF or AF signals.
- Use shielded cables for the external device, or use cables with better shielding (shielding) and a better connector.
- Shorten the cable length of the external device.
- Apply ferrites or other such devices to the cables of the external device
OLT cannot guarantee the performance of the system, as it has no control over the quality of external devices, cables and connectors other than those supplied by OLT. The system will work properly if appropriate devices are connected using good quality cables and connectors.
¶ Feature access buttons
At the bottom right are configurable quick access buttons for the Control Monitor, Trol, Conference Participants View and Voicemail, as well as access to additional feature buttons as defined by your administrator.
Voicemail: When this button is orange, it indicates that you have a voicemail message. Each time a user leaves a voice message, this button will flash. Pressing the voicemail button dials the voicemail system.
¶ Video streaming applet
Each button is configured as a separate video stream. Once a video stream has been selected, there are control buttons to stop the broadcast or to enlarge the central panel of the preferred page.
¶ Company directory (Only on CUCM)
This function allows you to search and browse the contents of the company directory published on the local soft-switch.
Two functions are available:
- The user queries the company directory based on three criteria: first name, last name and phone number. If no criteria are specified, all entries in the corporate directory are retrieved up to a predefined number of records.
- The user makes a call using a telephone extension found in an entry retrieved from the company directory.